 Save
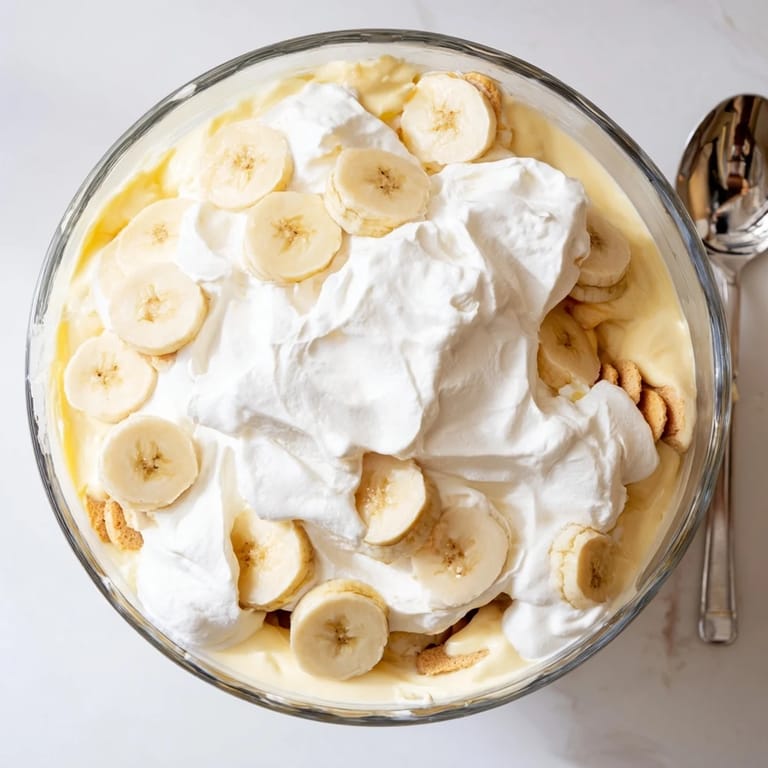
Save My grandmother made banana pudding for every church potluck and family gathering, and I swear people would actually count the servings to make sure they got a bowl before it disappeared. The way she layered those vanilla wafers with fresh bananas and that homemade pudding became the standard against which I measured every other dessert. There was something magical about how the cookies softened just enough while still holding their shape, creating this perfect texture contrast that store-bought versions never quite captured.
I once made this for a summer BBQ and watched my skeptical uncle who claimed he didnt like desserts go back for thirds. He kept asking what the secret ingredient was, but really it was just the patience of tempering those eggs properly and letting the pudding chill completely. Something about that creamy vanilla pudding with the sweet bananas and subtle crunch of the wafers just transports people back to simpler times.
Ingredients
- Granulated sugar: The foundation of our pudding base, providing just the right sweetness without overpowering the delicate vanilla flavor
- Cornstarch: This creates the silky smooth texture that sets our pudding apart from grainy versions, so measure accurately for perfect consistency
- Salt: A small pinch that might seem optional but actually makes all the difference in balancing and intensifying the vanilla notes
- Whole milk: Essential for that rich, creamy pudding texture, though Ive found 2% works in a pinch without anyone noticing
- Egg yolks: The secret to that luxurious, custard-like body that makes homemade pudding absolutely superior to boxed versions
- Unsalted butter: Stirred in at the end to add incredible richness and give the pudding that glossy, professional finish
- Vanilla extract: Use pure vanilla extract here because its the star flavor that defines the entire dessert
- Vanilla wafers: Classic Nilla wafers are traditional, but any plain vanilla cookie will work beautifully for layering
- Ripe bananas: Look for bananas with some brown spots because theyre naturally sweeter and creamier than underripe ones
- Heavy cream: Whipped into soft peaks to create that light, dreamy topping that balances the dense pudding layers
- Powdered sugar: Sweetens the whipped cream just enough while helping it hold its shape beautifully on top of the pudding
Tired of Takeout? 🥡
Get 10 meals you can make faster than delivery arrives. Seriously.
One email. No spam. Unsubscribe anytime.
Instructions
- Make the pudding base:
- Whisk together your sugar, cornstarch, and salt in a medium saucepan until thoroughly combined, then gradually whisk in the whole milk until the mixture is completely smooth with no lumps remaining.
- Cook until thickened:
- Place the saucepan over medium heat, stirring constantly with your whisk or a heat-proof spatula until the mixture thickens considerably and just begins to bubble, which should take about 6 to 8 minutes of patient stirring.
- Temper the egg yolks:
- While your milk mixture heats, lightly beat your egg yolks in a separate bowl, then whisk about half a cup of the hot milk into the yolks very slowly to warm them gently without scrambling.
- Combine and finish cooking:
- Return the warmed yolk mixture to your saucepan, whisking constantly, and cook for another 2 to 3 minutes until the pudding is thick, smooth, and coats the back of a spoon.
- Add butter and vanilla:
- Remove from heat completely and stir in your butter and vanilla extract until both are fully incorporated and the pudding looks glossy and irresistible.
- Cool the pudding:
- Transfer your pudding to a clean bowl and press plastic wrap directly onto the surface to prevent a skin from forming, then let it cool to room temperature before refrigerating for about an hour until thoroughly chilled.
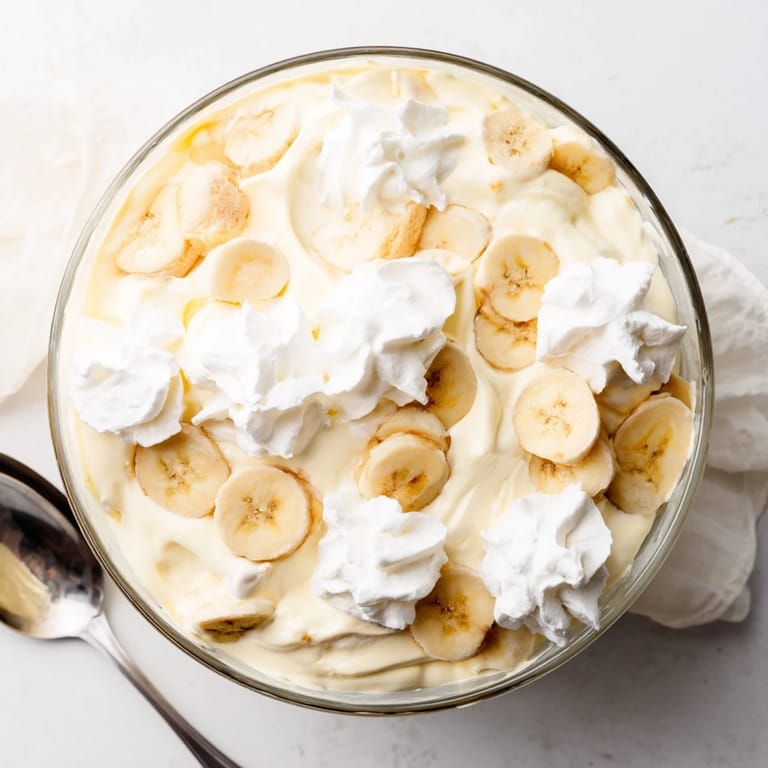
- Layer the dessert:
- In a 2 to 2.5 quart serving dish or trifle bowl, arrange one-third of your vanilla wafers, followed by one-third of the sliced bananas, then one-third of the chilled pudding, repeating these layers twice and ending with pudding on top.
- Chill and meld flavors:
- Cover your assembled dessert and refrigerate for at least 2 hours, though overnight is even better because this gives the flavors time to meld and those wafers time to soften perfectly.
- Make the whipped topping:
- Just before serving, whip your heavy cream, powdered sugar, and vanilla extract together until soft peaks form, then spread or pipe this cloud-like topping over your pudding layer.
- Garnish and serve:
- Optionally add a few extra vanilla wafers or fresh banana slices on top for that picture-perfect finish, then serve chilled and watch everyone light up.
 Save
Save This banana pudding has become my go-to comfort dessert, the one I turn to when friends need cheering up or families gather for celebrations. Something about those familiar flavors and textures just feels like home, no matter where youre serving it.
Making It Ahead
The beautiful thing about this dessert is that it actually improves with a bit of time in the refrigerator. I often assemble it the night before serving, which allows those vanilla wafers to soften just right and all the flavors to meld together into something even more delicious than the sum of its parts. Just wait to add the whipped cream topping until a couple hours before serving to keep it looking fresh and perky.
Storage Tips
Leftovers (if you somehow have any) should be covered and refrigerated, though I will honestly tell you that this dessert is at its absolute best within the first 24 hours. After that, the bananas can start to oxidize and soften more than ideal, though it will still taste delicious. The whipped cream may weep slightly but a quick gentle stir brings it right back to life.
Serving Suggestions
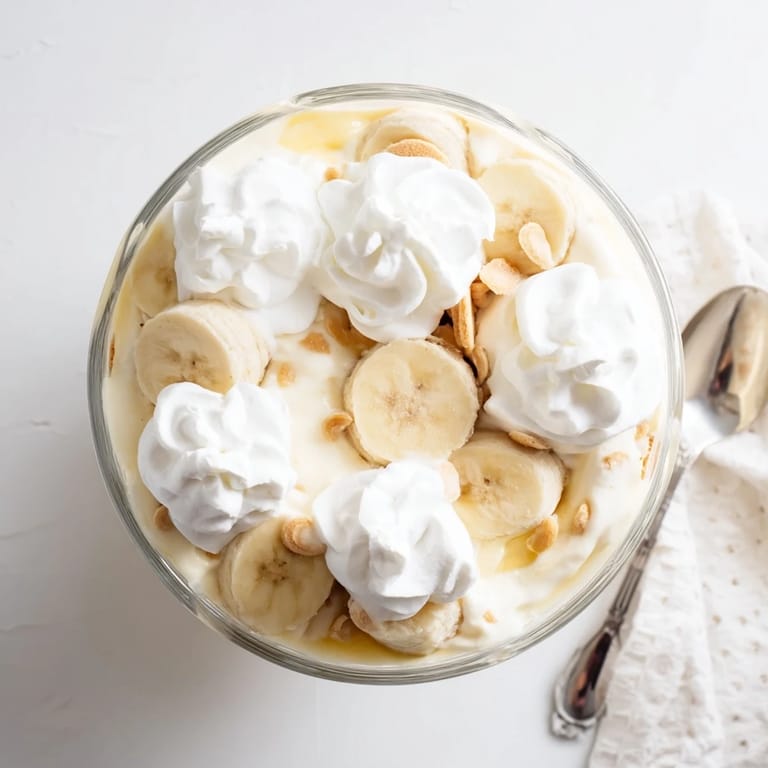
I love serving this in individual parfait glasses for a dinner party, or you can keep it traditional in a pretty glass trifle bowl that shows off those gorgeous layers. This dessert is rich enough to stand on its own, but a cup of hot coffee makes the perfect companion if youre serving it after a heavy meal.
- Try crumbling a few extra vanilla wafers on top for added texture contrast
- A sprinkle of cinnamon over the whipped cream adds a lovely warmth
- For extra flair, drizzle some caramel sauce between the layers
 Save
Save Theres something deeply satisfying about making a classic dessert from scratch, especially one thats been loved for generations. This banana pudding might just become your new signature recipe too.
Recipe FAQs
- → Can I make banana pudding ahead of time?
Yes, banana pudding actually improves after resting. The flavors meld together beautifully when refrigerated for at least 2 hours before serving. However, for best texture, consume within 24 hours as bananas may oxidize and wafers can become overly soft.
- → Why do my wafers get soggy?
Some softening is expected and desirable. The wafers absorb moisture from the pudding, creating that classic texture. To prevent excessive sogginess, assemble shortly before serving or use slightly under-ripe bananas which release less moisture.
- → Can I use instant pudding instead of homemade?
While instant pudding works in a pinch, homemade vanilla pudding provides superior creaminess and depth of flavor. The egg yolk-based custard creates a richer texture that pairs beautifully with the fresh bananas.
- → How do I prevent bananas from turning brown?
The best approach is slicing bananas just before assembling. Some cooks dip slices briefly in lemon juice, though this may alter the flavor. Alternatively, arrange banana slices just beneath the pudding layer where they're protected from air exposure.
- → What's the difference between Southern and traditional banana pudding?
Southern-style typically features homemade vanilla pudding and vanilla wafers, while Northern versions sometimes use boxed pudding and different cookies. The meringue topping is also common in Southern variations, though whipped cream is equally traditional.
- → Can I freeze banana pudding?
Freezing isn't recommended. The pudding texture changes dramatically when thawed, becoming grainy and separated. The bananas also turn brown and develop unpleasant textures. Best enjoyed fresh within 1-2 days.