 Save
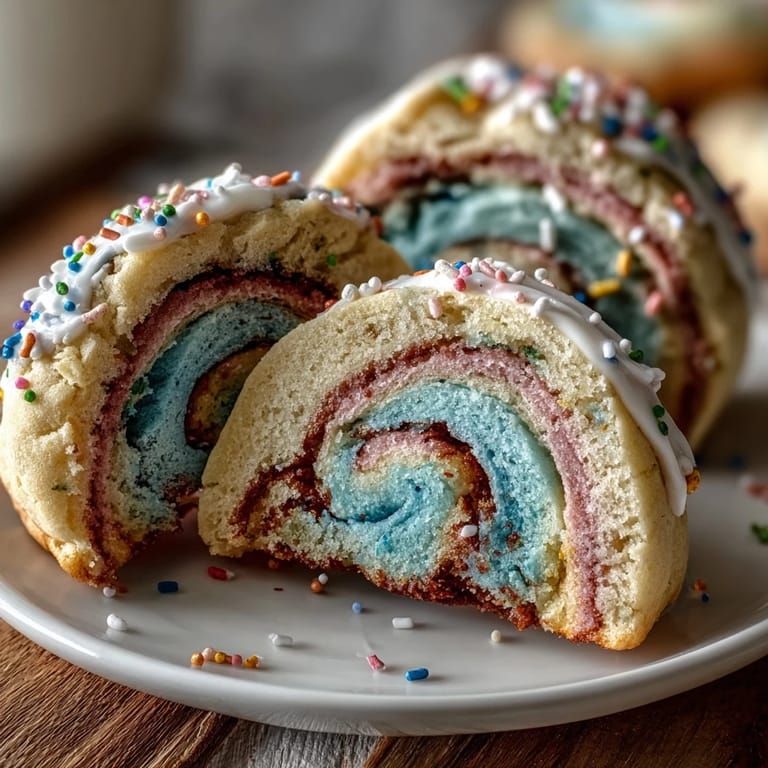
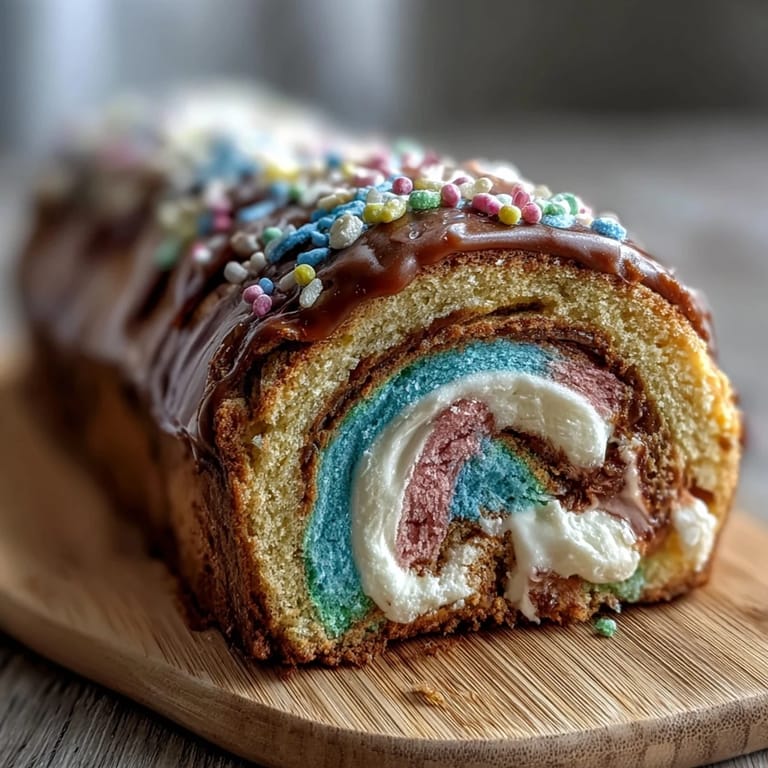
Save My niece showed me a screenshot from Cookie Run Kingdom last summer, and I was instantly charmed by those whimsical pastel swirl cookies in the game. She asked if I could make them real for her birthday, and that question sent me down a delightful rabbit hole of experimenting with gel food coloring and twisted dough logs. The first batch came out slightly wonky—my twists were too tight—but watching her face light up made every imperfect cookie feel like a small victory. Now these buttery, soft sugar cookies have become my go-to for any celebration where magic matters more than perfection.
I'll never forget the moment I pulled the first batch from the oven while my niece watched from the kitchen doorway, her eyes wide as the pastel swirls caught the afternoon light. She immediately grabbed her phone to photograph them, and I realized these cookies had transcended the digital game world entirely—they'd become something real that she wanted to share with her friends. That's when I understood: the best recipes aren't just about feeding people, they're about creating moments worth remembering.
Ingredients
- All-purpose flour (2 1/2 cups): This is your dough's foundation, and measuring by weight rather than volume keeps things consistent—I learned this the hard way after one batch turned dense and heavy.
- Unsalted butter (1 cup, room temperature): Room temperature is non-negotiable here; cold butter won't cream properly and you'll end up with a grainy texture instead of that fluffy, dreamy base.
- Granulated sugar (1 cup): The butter-sugar marriage is where the magic happens—this creaming step is what gives these cookies their signature tender crumb.
- Large egg (1): This binds everything together while keeping the dough workable enough to color and twist without becoming sticky.
- Pure vanilla extract (2 tsp) and almond extract (1/2 tsp, optional): The almond extract adds a subtle floral note that makes people ask what your secret ingredient is.
- Baking powder (1/2 tsp): Just enough to give them a gentle rise, not so much that they puff up like cake cookies.
- Salt (1/4 tsp): This tiny amount does the heavy lifting of balancing sweetness and highlighting the vanilla.
- Gel food coloring in pastel shades: Gel beats liquid coloring every single time—it won't thin out your dough, and the colors stay true without turning muddy.
- Pastel sprinkles (1/4 cup): These are purely optional, but they catch the light beautifully and add that final touch of whimsy.
Tired of Takeout? 🥡
Get 10 meals you can make faster than delivery arrives. Seriously.
One email. No spam. Unsubscribe anytime.
Instructions
- Mix your dry ingredients:
- Whisk together the flour, baking powder, and salt in a medium bowl, then set it aside so it's ready when you need it. This step prevents lumps and ensures even leavening throughout the dough.
- Cream butter and sugar:
- Beat them together in your largest mixing bowl for about 2-3 minutes until the mixture goes pale, fluffy, and noticeably lighter in color. You'll know it's ready when you lift the mixer and the mixture falls in soft ribbons rather than a heavy plop.
- Add your wet ingredients:
- Introduce the egg, vanilla, and almond extract (if using), beating until everything is well combined and the mixture looks smooth and slightly glossy. The dough should come together without any visible streaks of egg or vanilla.
- Bring it together gently:
- Add your dry ingredients to the wet mixture in three additions, mixing on low speed just until combined after each addition. This is the moment where restraint matters—overmixing develops too much gluten and turns your cookies tough instead of tender.
- Divide and tint:
- Divide and tint your dough:
- Split the dough into 3 or 4 equal portions, then add a few drops of gel food coloring to each one and knead gently with your hands until the color is evenly distributed. The dough might feel slightly sticky as you work it, which is completely normal.
- Roll into ropes:
- Shape each colored portion into a long rope about 12 inches long, using your palms and the work surface to guide you. If the dough resists, let it rest for a few minutes—it'll become more cooperative.
- Create the swirl:
- Lay your colored ropes next to each other and gently twist them together, then roll the twisted bundle into a log shape. Don't twist too tightly or you'll muddy the colors; a loose, gentle twist looks more beautiful.
- Chill your dough:
- Wrap your log in plastic wrap and refrigerate for at least 2 hours, or overnight if you prefer—this firms up the butter and makes slicing clean and easy. Cold dough also spreads less in the oven, giving you cookies with sharper edges.
- Prepare and bake:
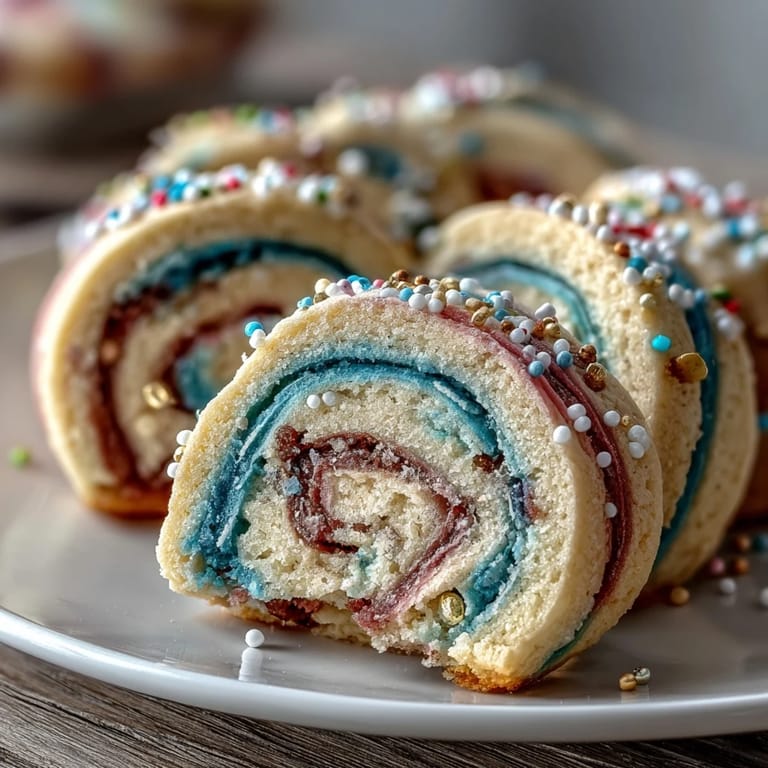
- Preheat your oven to 350°F and line baking sheets with parchment paper, then slice your chilled log into 1/4-inch thick rounds and space them about 2 inches apart. Bake for 10-12 minutes until the edges are just beginning to turn golden—pulling them out slightly underbaked keeps them soft and tender.
- Cool with patience:
- Let the cookies sit on the hot baking sheet for 5 minutes so they firm up just enough to move without falling apart, then transfer them to a wire rack to cool completely. They'll continue to set as they cool, and you'll notice the edges firm up while the centers stay wonderfully soft.
 Save
Save There's something deeply satisfying about watching someone bite into a cookie and discovering those beautiful pastel swirls inside, the buttery sweetness hitting first before they notice the subtle almond undertone. My niece now requests these for every birthday, and her friends have started asking me to make them too—it's become this lovely chain reaction of joy, all started by a video game screenshot and a willingness to try something whimsical.
The Science Behind Soft Cookies
What makes these cookies stay tender even days later comes down to a few key factors working in harmony. The creaming step incorporates tiny air bubbles that create a fine, delicate crumb structure, while the ratio of butter to sugar ensures enough moisture stays trapped in the cookies to keep them soft. The trick is knowing when to stop mixing—overmixing develops gluten strands that make cookies tough, so you want just enough mixing to combine ingredients without developing that elastic, dough-like texture.
Choosing and Using Gel Food Coloring
I made the mistake early on of reaching for liquid food coloring because it was what I had on hand, and the results were disappointing—the colors turned muddy, the dough got too thin, and I ended up with flat, fragile cookies. Gel coloring changed everything because it's concentrated, doesn't add liquid to your dough, and gives you vibrant pastels without any guesswork. A tiny drop goes a long way, so start conservatively and add more if you need deeper color; you can always add more, but you can't take it out.
Make-Ahead Magic and Storage Secrets
These cookies are wonderfully forgiving when it comes to timing, which makes them perfect for busy weeknights or advance party planning. The dough log keeps beautifully in the refrigerator for up to three days, so you can slice and bake whenever you need fresh cookies, or you can freeze the entire unbaked log for up to two months and bake straight from frozen (just add a minute or two to the baking time). Once baked, store them in an airtight container at room temperature where they'll stay soft and tender for five days, though honestly they rarely last that long in my house.
- For the softest texture, store cookies with a small piece of bread in the airtight container—it adds moisture that keeps them tender.
- If you want to gift them, line a box with parchment paper and layer cookies between sheets so they don't break during transport.
- Frozen baked cookies thaw in about fifteen minutes and taste just as good as the day you made them.
 Save
Save Every time I make these pastel swirl cookies, I'm reminded that the most memorable recipes are often the ones that mean something beyond just tasting good—they're the ones that make someone smile, that get requested year after year, that become part of a story. These are those cookies.
Recipe FAQs
- → How do I achieve the pastel swirl effect?
Divide the dough into portions, tint each with gel food coloring, then twist colored ropes before chilling and slicing.
- → Can I substitute almond extract?
Yes, almond extract is optional. Vanilla alone provides a sweet, aromatic flavor base.
- → Why is chilling the dough important?
Chilling firms the dough, making it easier to slice clean rounds and maintain swirl patterns during baking.
- → How should I store these cookies?
Keep in an airtight container at room temperature for up to five days or freeze for up to two months.
- → What texture can I expect?
These cookies are soft and tender with a slight buttery crisp on the edges after baking.
- → Can I use natural coloring instead of gel colors?
Gel food coloring is recommended for vibrant pastel hues without affecting dough texture significantly.